Pushing the limits of what a groove can be through syncopation
Welcome back!
Welcome to my blog where I will be exploring the art of drum set notation using notation software, specifically Musescore 4. This is an 8 week project, where I have been delving into the vast potential of drum set music, from learning to write basic rock measure grooves to maybe not so basic rock grooves, and eventually different styles. In my journey so far, I’ve learned to write basic rock measure grooves using a grid system for writing, and this week I plan to push the limits of what a rock beat can be by incorporating syncopation within the rhythm of the rock groove. Join me as I explore the exciting world of drum set notation!
Transforming the groove
Now that we’ve got a handle on crafting groovy bass drum kicks within the eighth note grid, it’s time to level up and get a little more intricate. So, picture this: the bass drum hits on every eighth note, but what if we started shifting those hits around, experimenting with new patterns that deviate from the strict confines of the grid? It’s time to push the boundaries and explore the endless possibilities that lie beyond the predictable, so let’s get creative and start playing with the placement of those bass drum hits!
Expansion of possibilities
Notice how in this example, we have bass drum kicks on sixteenths leading up to the strong beat 3 and even beat 1. This creates a sense of direction and energy within the groove, with each note leading into a stronger, heavier beat. It may seem like this is completely outside of the grid system, but it’s actually still following the eighth note formula given by the hi-hat. The bass drum is simply evenly splitting the eighth note, allowing for a more complex and unique sound.


Suddenly too many possibilities?
Now that we’ve added the sixteenth note offset to our repertoire, the possibilities for writing rock grooves have multiplied exponentially. The examples I’ve shown here demonstrate how the bass drum can be used on quarter notes, eighth notes, and sixteenth notes. The combinations of these subdivisions and where they’re placed within a bar are almost endless. It’s like a never-ending puzzle to find the perfect placement for each note to create a groove that sounds amazing. It’s both challenging and exciting to explore all the different ways the subdivisions can be manipulated to create something unique and memorable.
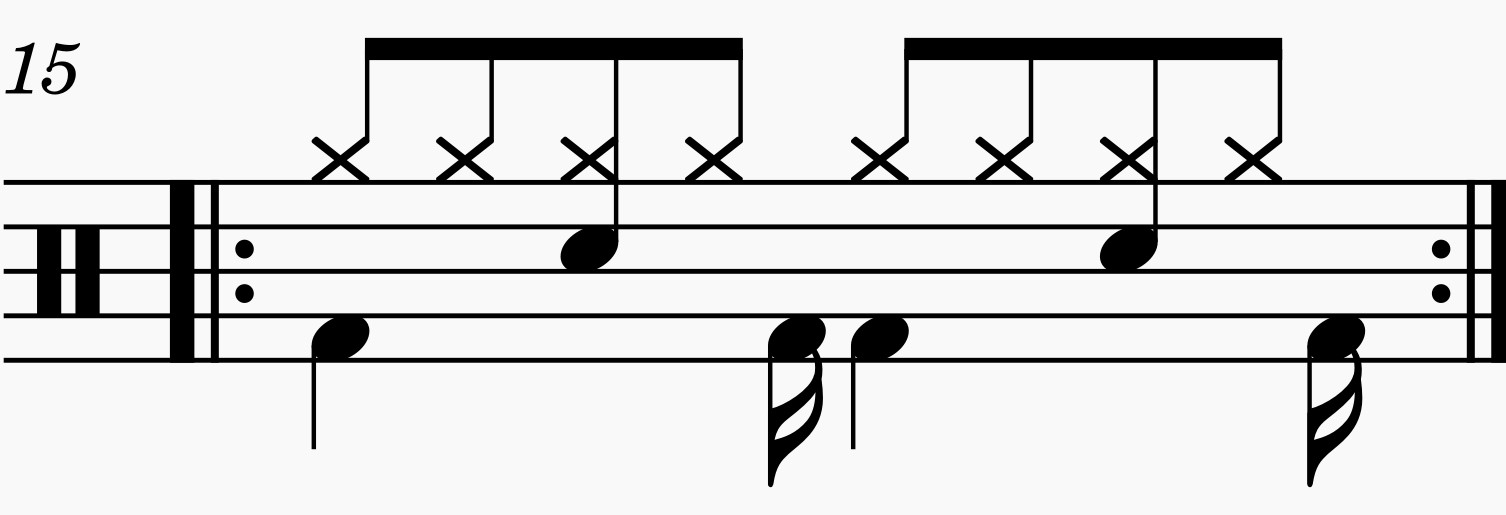
Something to be careful of especially with music notation software.
As I delve deeper into writing more intricate rhythmic syncopation, I’ve come to realize the importance of ensuring that the measures aren’t overly cluttered with unnecessary visual noise. This example highlights how notation software can add sixteenth rests to make sure everything fits metronomically within a measure, resulting in additional clutter in the rock beat. However, through my experience of writing more complex grooves, I’ve learned the importance of cleaning up the music and removing these rests. Standard drum set notation allows for a clear understanding of what’s going on without them. This experience has taught me to be more mindful of visual noise and to do a better job of cleaning up these measures, especially when notating more complex syncopated patterns.


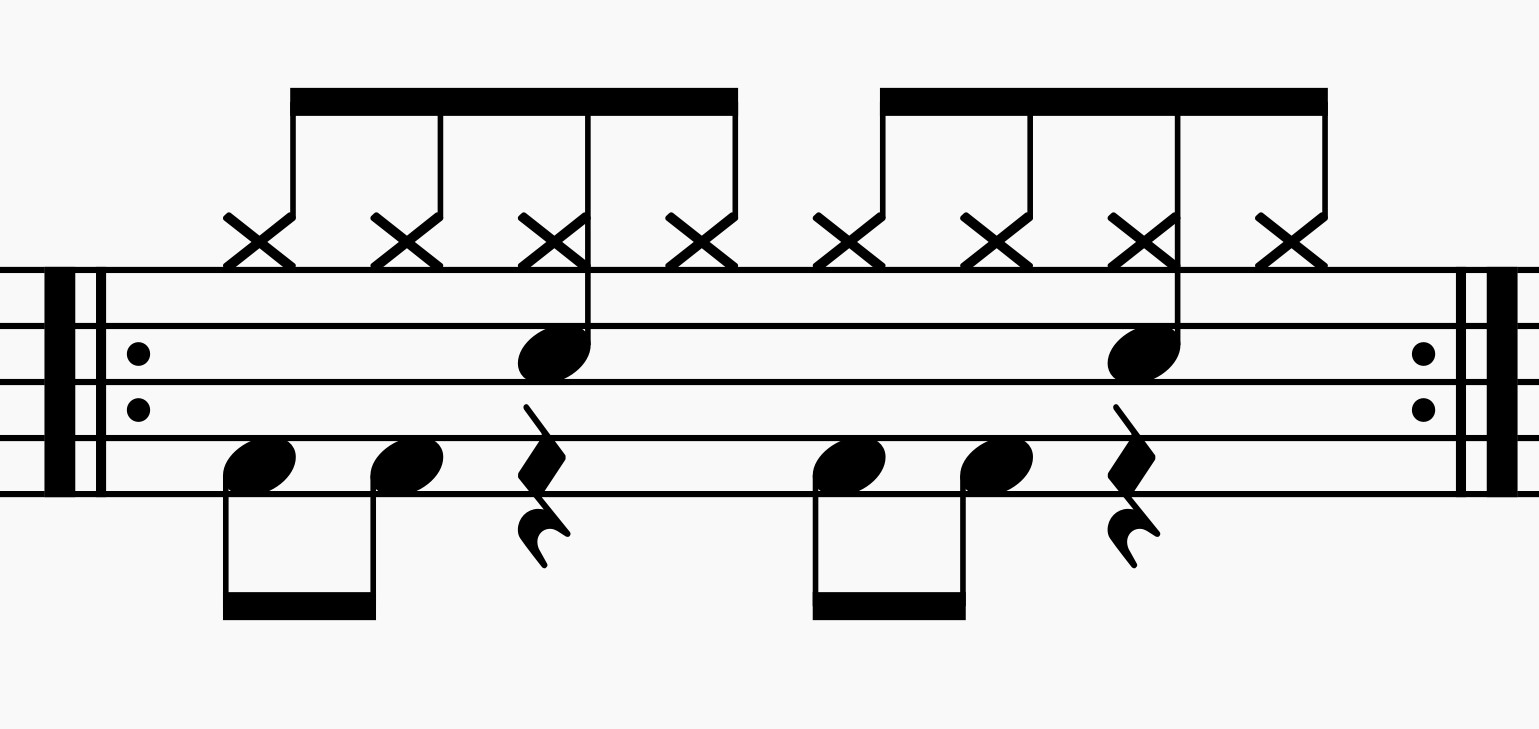
A beat from last week looking cleaner!
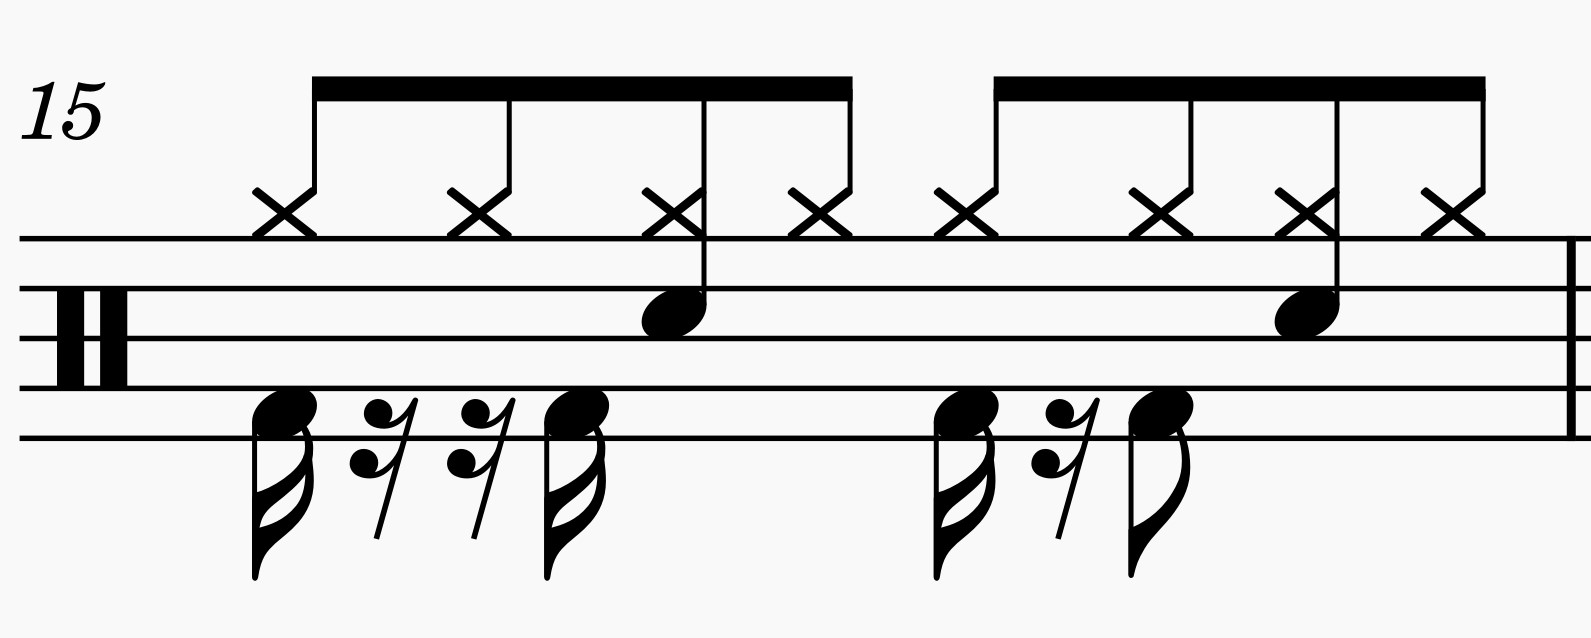
Cleaning up the visual noise in drum set music is a powerful tool for creating clear and easy-to-read notation. As drum set music can be complex and busy, getting rid of unnecessary rests or notes that don’t need to be there can make a big difference in how the music looks on the page. It’s not just about aesthetics though – clean notation can help performers to quickly and accurately read and interpret the music, leading to better performances. So, taking the time to clean up the visual noise can be a valuable investment in making the music more accessible and effective.

Cleaning up a measure with a lot of syncopation can be quite the challenge. With so much going on, it can be difficult to create a clear and easy-to-read notation. But putting in the time and effort to do so can be extremely rewarding. It may take longer to clean up measures with complex grooves, but the end result is a polished and professional-looking score that is easy for performers to read and interpret. And that feeling of accomplishment when you finally get it looking just right? It’s definitely worth it.
Learning a lot even through frustration
Sometimes, cleaning up the visual noise in more complex drum set grooves can feel like an uphill battle. There were definitely moments where I just wanted to throw my hands up and take a break. But pushing through those frustrations ended up being incredibly beneficial. Not only did I get a better grasp on how to efficiently use notation software, but I also gained a deeper understanding of how to make something look cleaner and more professional on the page. This newfound knowledge isn’t just helpful for writing cleaner and groovier kit grooves – it’s also going to be a big asset in tackling other complicated notation projects in the future. So, while it may have been a bumpy road at times, it was ultimately worthwhile.
Conclusion/Preview!
This week, we dove headfirst into the world of more complex drum set grooves and boy was it a journey! Inputting these intricate rhythms into Musescore 4 definitely had its fair share of frustrating moments, but the overall learning experience was absolutely fantastic. It’s amazing to see how much more we can achieve by adding in a few extra notes here and there, and how it can completely change the feel and intensity of a groove. Even though this week was a bit more challenging than usual, I’m still incredibly excited to keep exploring and writing more complex grooves. And speaking of which, next week we’ll be continuing our exploration of rock grooves, but with even more complexities based on the concepts we heavily learned this week. I can’t wait to see what I’m able to achieve next week!