Always striving for more when its over.
Welcome back!
It’s been a fantastic opportunity to dive deep into drum set notation and explore the various nuances that come with writing for this instrument. From learning how to notate basic rock and swing beats, to more advanced techniques such as polyrhythms and odd meters in my experimentation, it’s been a journey filled with challenges and rewards. One of the most satisfying aspects has been seeing how much progress I’ve made over the course of this project, both in terms of technical proficiency and creative expression. So join me, as I wrap up this project with my final thoughts!
Introduction
Starting this project was a significant step towards achieving my goal of using notation software to write music. Initially, I was hesitant to start because I was intimidated by the vast amount of information to learn, but using drum set as my starting point made the process more approachable. As a result, I gained a deeper understanding of how to write music, and it was exciting to see my skills grow over time. It’s been an unexpected experience to find that people who have written more music than I have come to me for advice on writing drum set parts. As a drummer, I’ve always been interested in writing music for the drum set. However, without any prior knowledge of music notation software, I felt a bit apprehensive about where to begin. When I stumbled across Musescore 4 which had just recently come during the time of the start of the project, I knew I had found the perfect tool to help me achieve my goal.
Results
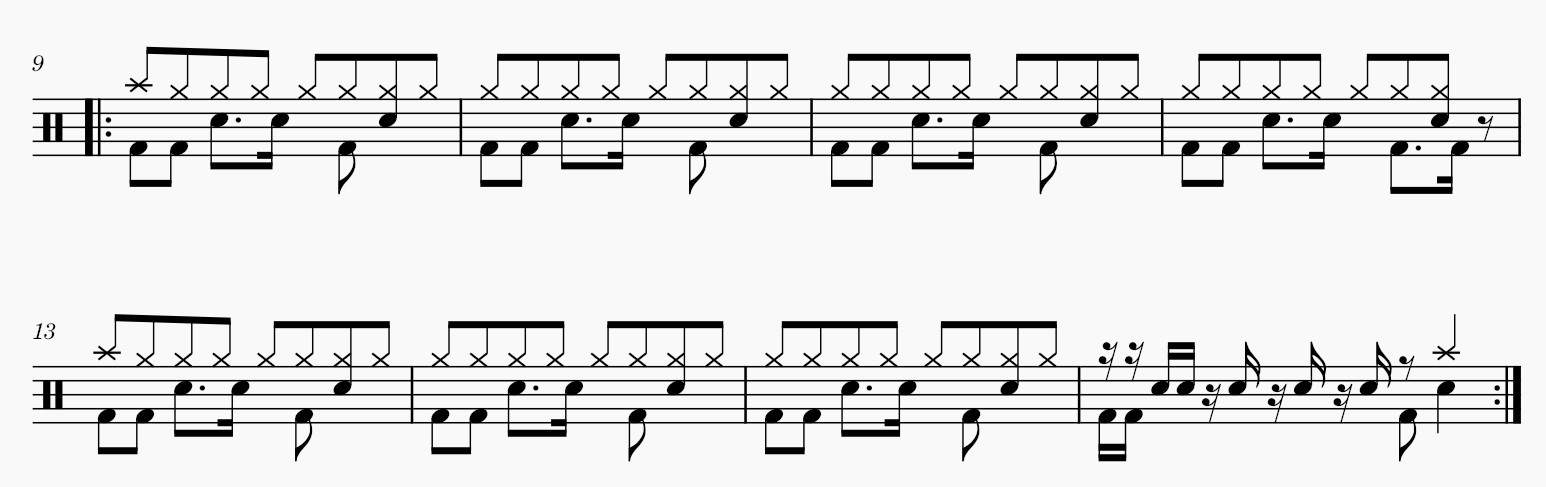
Throughout the course of this project, my main focus was on learning how to use notation software through drum set writing. However, as I progressed and gained a deeper understanding of the various concepts and techniques, I was able to incorporate them into different exercises and create a well-rounded project. I included audio for the music below. I highly encourage you to give it a listen and follow along with the parts to really hear how they flow and sound. These exercises repeat each 8 bar phrase, so you can really hear how a phrase can seamlessly flow back into itself. It’s a great way to get a feel for the rhythms and how they fit together.

Rock Exercises Audio

Rock Exercises 2 Audio
Timeline
had an 8 week plan to make sure I got what I wanted out of the project. Here is that timeline over the 8 weeks:
Week 1: The first week was dedicated to learning how to use the notation software and input basic things like notes themselves. In addition, I wrote a simple rock beat.
Week 2: The second week was spent expanding on the details of the simple rock beat and introducing the concept of fills.
Week 3: During the third week, I delved into the pitfalls of writing drum set music and what to avoid.
Week 4: Week four was all about introducing more rhythms into the grid through adding more notes into the bass drum.
Week 5: In the fifth week, I continued expanding on syncopation through even more complex rhythms through the bass drum.
Week 6: The sixth week focused on continuing syncopation through the bass drum and figuring out how to input it into the snare drum.
Week 7: In week seven, I utilized all of the tools I had learned to create longer strands of music. I also slightly touched on the concept of swing.
Week 8: Finally, in week eight, I utilized many of the tools I had learned throughout the 8 weeks to create some exercises to showcase what I had accomplished!
Reflection
.
This project has been a great learning experience for me. Not only have I gained a stronger understanding of notation software and drum set notation, but I have also learned a lot about myself as a musician. I’ve discovered that I have a real passion for writing and arranging music, and that it’s something I want to continue to pursue in the future. One of the biggest takeaways from this project is the importance of taking small steps and building upon each success. At the beginning, I was overwhelmed by the amount of information and techniques I needed to learn, but by breaking it down into smaller, manageable tasks, I was able to make steady progress over the course of eight weeks.
It no longer feels like there is a lot to take in
Looking back at my first blog post, it’s incredible to see how much growth and development has taken place in just eight weeks. At the beginning, I struggled to efficiently create drum set music using Musescore 4, but now I can quickly and efficiently input things into the software without any issue. I’ve come to understand the intricacies of the software and even discovered more advanced techniques for editing note duration and utilizing the drum set notation editor. At first seeing all of these options kind of scared me, but after diligently learning how all of these items in this toolbox work, it just makes me want to keep diving in and seeing what else is possible!
Planted seeds sneakily sprouting
Looking back on blog post 2, I can see how repetition is still an important aspect of creating a great groove, but I’ve also learned how to take it a step further. As I continued to progress throughout the weeks, I found myself building upon the foundation of basic rhythmic patterns that I had established earlier on. By adding more complexity and experimenting with different combinations, I was able to create more unique and interesting drum parts. However, I also realized the importance of balance – it’s important to know when to simplify and stick to the basics, and when to add in more complex ideas. This balance has been key in my growth as a drum set writer, and it’s allowed me to create more dynamic and compelling drum parts.


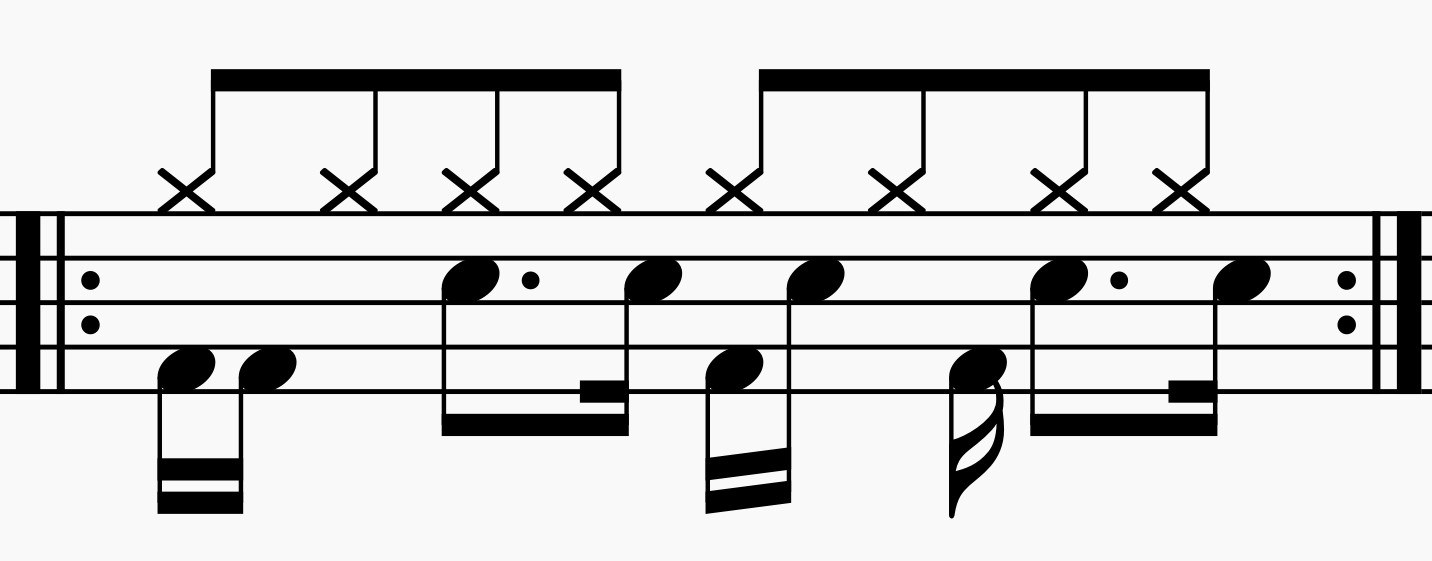
It’s important to note that all of these complicated looking measures I’ve written in the past few weeks were built off the foundation of the basic rock beat, and even as I continue to write more intricate drum grooves, I always start with that basic rock beat as my starting point.

I was really having fun too!
As I delved deeper into the complexities of drum set notation, I found myself becoming more and more intrigued by the different rhythmic values and how they could be utilized to create unique and compelling rhythms. While experimenting with other instruments and different rhythmic values was interesting, the challenge of inputting these ideas into drum set notation was more complex than I initially anticipated. But as I began to understand the nuances of the notation software, the process became much more enjoyable, and it was incredibly satisfying to see my ideas finally taking shape on paper.
Video
Thank you for reading along to my journey in this project where I learned how to use notation software through drum set writing. It’s been an exciting experience, and I’m grateful for the opportunity to share it with you. I put a lot of effort and dedication into this project, and I’m proud of the results. I’m pleased to share the final part of this project, which is a video describing the whole thing and the experience I had. I hope you’ll enjoy watching it as much as I enjoyed creating it. Once again, thank you for following me on this journey, and I hope you’ve learned something new or found inspiration for your own creative projects.